By: Team T12-2 Since: Aug 2018 Licence: MIT
- 1. Introduction
- 2. Quick Start
- 3. Features
- 3.1. View help :
help - 3.2. Switch to patient management mode :
mode patient - 3.3. Switch to appointment management mode :
mode appointment - 3.4. Add a patient :
add patient - 3.5. Select a patient :
select patient - 3.6. Edit patient information :
edit patient - 3.7. List all patients :
list patient - 3.8. Locate patients :
find patient - 3.9. Delete a patient record :
delete patient - 3.10. Add an appointment :
add appointment - 3.11. Select an appointment :
select appointment - 3.12. Edit appointment information :
edit appointment - 3.13. List all appointments :
list appointment - 3.14. Locate appointments :
find appointment - 3.15. Delete an appointment :
delete appointment - 3.16. Clear all appointments :
clear appointment - 3.17. Add a disease :
add disease - 3.18. List all diseases :
list disease - 3.19. Locate diseases :
find disease - 3.20. Predict disease :
predict - 3.21. Locate drug :
find drug - 3.22. Read more about drug :
moreinfo - 3.23. List entered commands :
history - 3.24. Exit the programme :
exit
- 3.1. View help :
- 4. Command Summary
1. Introduction
PatientBook is an all-in-one convenience utility for medical professionals in Singapore. It is used to store and manage patient data as well as appointment schedules. It can also be used to retrieve information about disease, symptoms and drugs. Patientbook uses simple and intuitive “commands” to receive instructions from the user – this makes it speedy, lightweight and easy to pick up. Refer to Section 2, “Quick Start” to begin using PatientBook.
2. Quick Start
-
Ensure you have Java version 9 or later installed on your computer. If not, the latest version of Java can be downloaded here.
-
Download the latest version of
patientbook.jarhere. -
Copy the downloaded file to the folder you wish to use as the home folder for PatientBook.
-
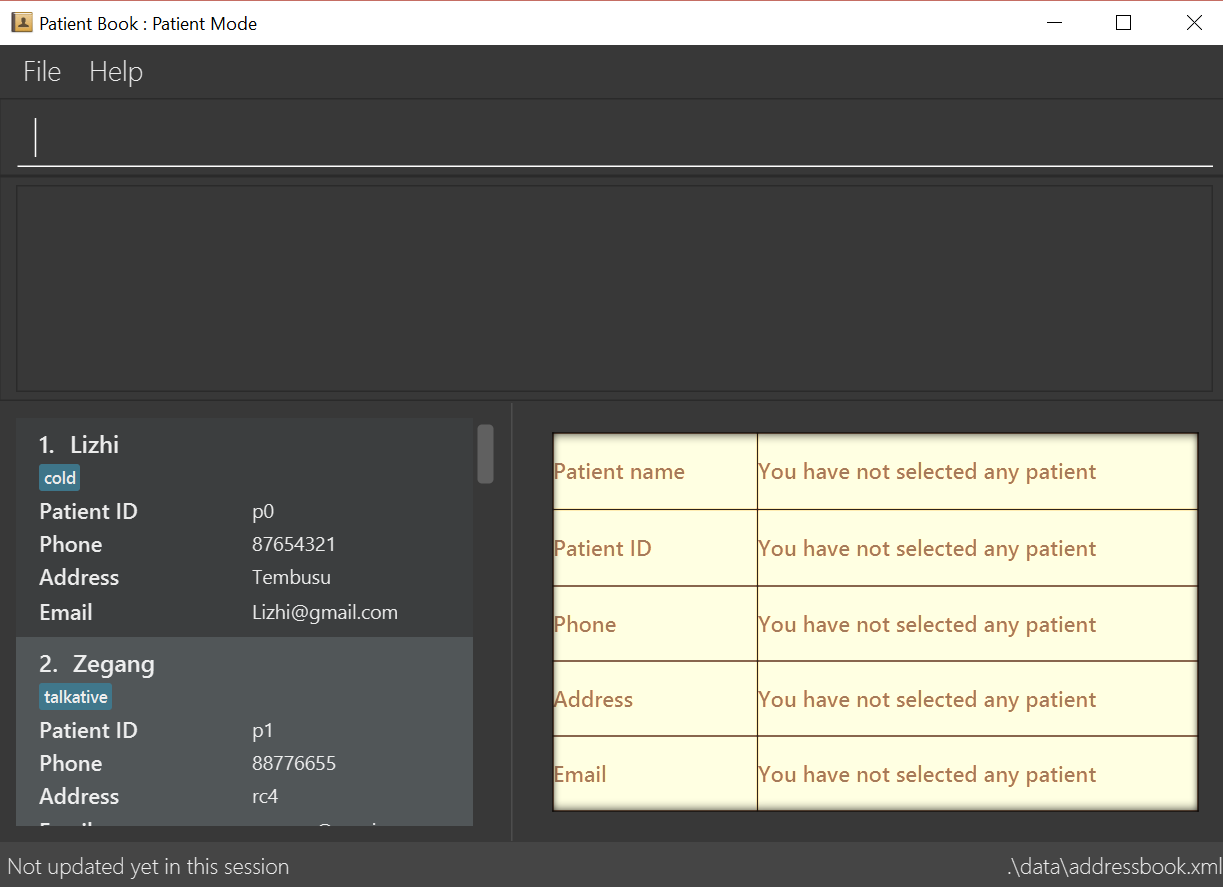
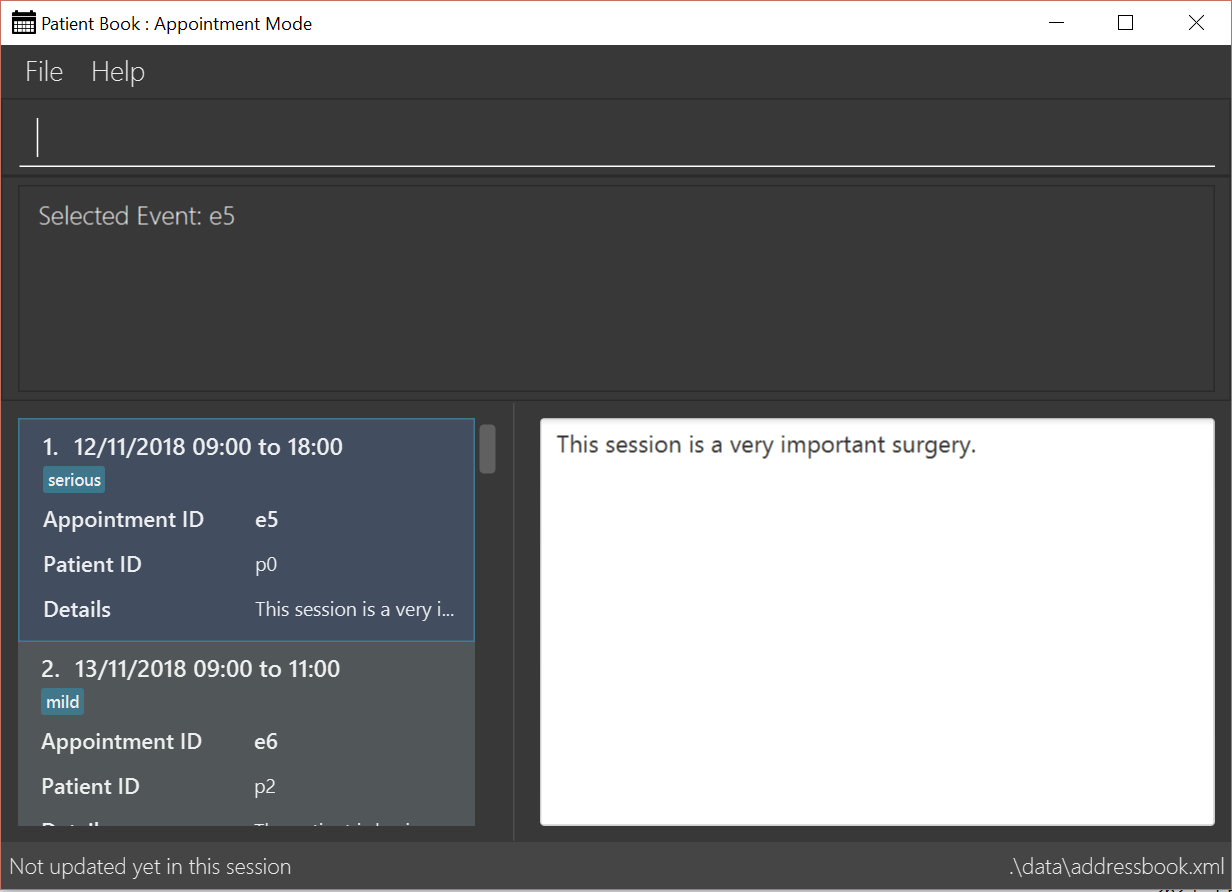
Double-click the file to start PatientBook. The following GUI should appear in a few seconds.
-
Type the command in the command box and press Enter to execute it.
e.g. typinghelpand pressing Enter will open the help window. -
Some example commands you can try:
-
mode patient: switches to patient management mode. -
mode appointment: switches to appointment management mode. -
add patient n/David Lee p/99998888 a/Utown e/davlee@gmail.com: automatically switches to patient management mode and add patient David Lee into the patient record, with the details provided. -
delete patient p0: deletes patient with patient ID 'p0'. -
add appointment for Lee next week: automatically switches to patient management mode, and schedules an appointment for patient whose name matches Lee some time next week. -
delete appointment e0: deletes appointment with appointment ID 'e0'. -
exit: exits the app.
-
-
Refer to Section 3, “Features” for details of each command.
3. Features
Command Format
-
Commands are, in general, case sensitive.
-
Words in
UPPER_CASEare parameters to be supplied by the user. eg. inadd patient n/NAME,NAMEis a parameter which can be used asadd n/John Doe. -
Items in square brackets are optional.
eg. inadd patient [t/TAG],TAGis an optional parameter. -
Parameters with prefixes may be specified in any order, eg. all parameters for
add patient, such asn/NAMEanda/ADDRESScan be specified in any order -
Commands which accept only a unique value for each prefixed parameter will only accept the last one entered for each type.
eg.add patient n/John n/Sallywill add a patient with the nameSally, and ignoreJohnaltogether.
3.1. View help : help
Format: help
Opens this user guide to display information on how to use PatientBook. Help command works in both patient management mode and appointment management mode.
3.2. Switch to patient management mode : mode patient
Format: mode patient
Switches the application to patient management mode. In this mode, you can view and manage patients’ data. When you enter a valid command regarding patient in appointment management mode, the application will switch to patient management mode automatically.

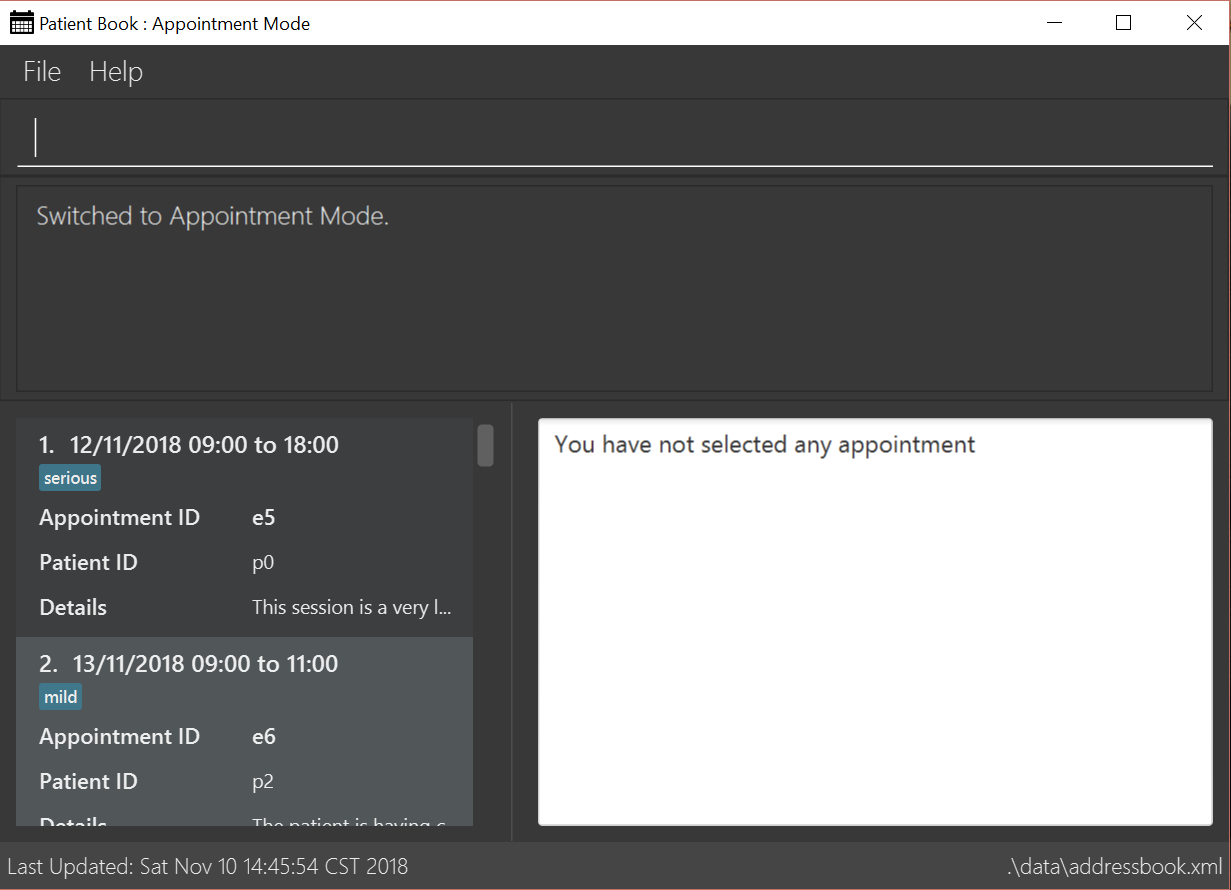
3.3. Switch to appointment management mode : mode appointment
Format: mode appointment
Switches the application to appointment management mode. In this mode, you can view and manage your patient’s appointments. When you enter a valid command regarding appointment in patient management mode, the application will switch to appointment management mode automatically.
| By default, the list panel only displays appointments in the future. |
3.4. Add a patient : add patient
Format: add patient n/NAME p/PHONE a/ADDRESS e/EMAIL [t/TAG]
Creates a new patient record and saves it in the list of all patient records. If necessary, switches the application to patient management mode.
| Any number of tags may be included, or none at all. |
Examples:
-
add patient n/John Smith p/90516038 a/New Smith Street, Singapore 519321 e/johnsmith@gmail.com -
add patient n/Alice Barker p/62353535 a/4 Pizza Road, Singapore 941023 e/alice_barker@yahoo.com.sg t/friend t/groupmate
3.5. Select a patient : select patient
Format: select patient PATIENT_ID
Selects an existing patient and its information will display on the right. If necessary, switches the application to patient management mode. Selecting patient replaces physically clicking an patient card. Hence, you can only select a patient that is displayed on the left.
You may select a deleted patient by first typing list patient all.
|
Examples:
-
select patient p1 -
select patient p29

3.6. Edit patient information : edit patient
Format: edit patient PATIENT_ID [n/NAME] [p/PHONE] [a/ADDRESS] [e/EMAIL] [t/TAG]
Edits an existing patient record. If necessary, switches the application to patient management mode.
| At least one of the optional fields must be provided. |
Editing tags will remove all existing tags from the patient and replace them with the new tags. To remove all tags from a patient, use t/ without any further input after the /.
|
Example:
-
edit patient p229 n/Bob Ross p/95106202 -
edit patient p24 t/replacedTag t/friend -
edit patient p510 a/New Address Road, Singapore 401914 t/
3.7. List all patients : list patient
Format: list patient [all]
Shows a list of all patients in the patient record. Using all will display all patients deleted in the past. If necessary, switches the application to appointment management mode.
3.8. Locate patients : find patient
Format: find patient KEYWORD [MORE_KEYWORDS]
Alternative Format: find patient PATIENT_ID
Notable Behaviour:
-
The search is case insensitive, eg.
hanswill matchHans -
The order of keywords do not matter, eg.
Hans Bowill matchBo Hans -
Only names in the patient record are searched
-
Patients which are marked as deleted can only be found by looking up their Patient ID explicitly. They may not be found via keyword search
-
Only full words will be searched, eg.
Hanwill not matchHans -
Patient which match at least one of the keywords will be displayed after running the search, eg.
Hans Bowill matchHans GruberandBo Yang -
Finding a patient via their ID will match and display patients who have the exact same ID as the search term, unless the ID is for some reason part of another patient’s name, in which case they will be displayed as well
Examples:
-
find patient john -
find patient Alice bob -
find patient p510
3.9. Delete a patient record : delete patient
Format: delete patient PATIENT_ID
| Patient records will only be marked as deleted, rather than being removed altogether. This is due to the sensitive nature of patient information |
Examples:
-
delete patient p510 -
delete patient p29
3.10. Add an appointment : add appointment
Format: add appointment for NAME TIME
Alternative Format: add appointment for PATIENT_ID TIME
Creates a new appointment and places it in the schedule. If necessary, switches the application to appointment management mode.
| Unlike other commands, this command does not require any prefixing. |
For TIME parameter, user may choose to use natural expressions to indicate the time or period where the appointment is to be scheduled. The list of natural expressions for TIME accepted by the programme include:
-
tomorrowortmr -
the day after tomorroworthe day after tmr -
in * dayorin * days -
in * weekorin * weeks -
in * monthorin * months -
this weekornext week -
this monthornext month -
this Mondaythis Tuesdaythis Wednesdaythis Thursdaythis Fridaythis Saturdayorthis Sunday -
next Mondaynext Tuesdaynext Wednesdaynext Thursdaynext Fridaynext Saturdayornext Sunday -
soon -
recently -
in a few days -
in
DD/MM/YYYYformatAsterisk (*) denotes any positive integer number. Adding an appointment with a time that is already past is allowed. However, this functionality should only be used when user wants to record some critical information about a past appointment that is for some reason unscheduled beforehand.
After the initial input is processed by the programme, user may encounter a maximum of four prompt windows for further input, including:
-
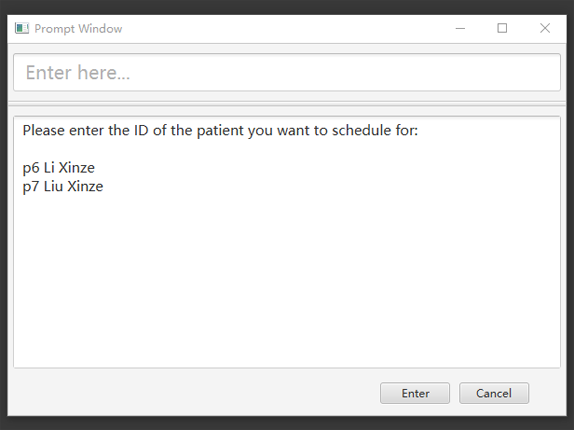
A prompt window where user is required to choose the correct patient to schedule for, if the name provided in the initial input can be matched to multiple patients in the record. The definition of a successful match is the same as that of the command
find patient, as explained above.Patient_IDof the intended patient is to be entered. -
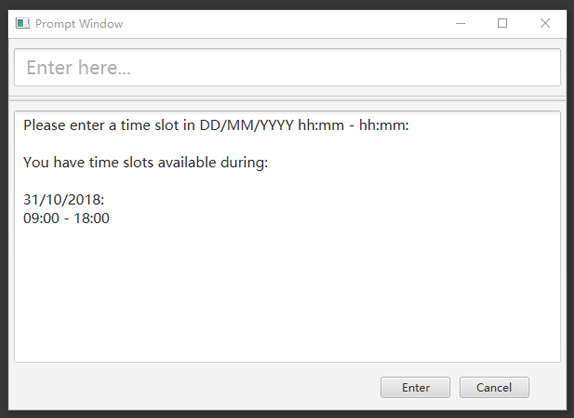
A prompt window where user is required to provide a specific time slot for the appointment, from a list of available time periods, in
DD/MM/YYYY hh:mm - hh:mmformat. -
A prompt window where user may choose to provide any tags for the appointment.
-
A prompt window where user may choose to provide any additional notes for the appointment.
Example:
Command entered: add appointment for Xinze tomorrow
1) There are multiple patients named Xinze in the patient record. Programme requests for a specific patient ID, in a prompt window similar to the following:
2) Once Xinze is matched to a unique patient in the patient record, programme displays a list of available time periods during tomorrow, based on the current time at which the command is executed, in another prompt window similar to the following:
3) User further inputs: 31/10/2018 9:30 - 10:30. Programme proceeds to request for tags to be attached to the appointment, in another prompt window similar to the following:
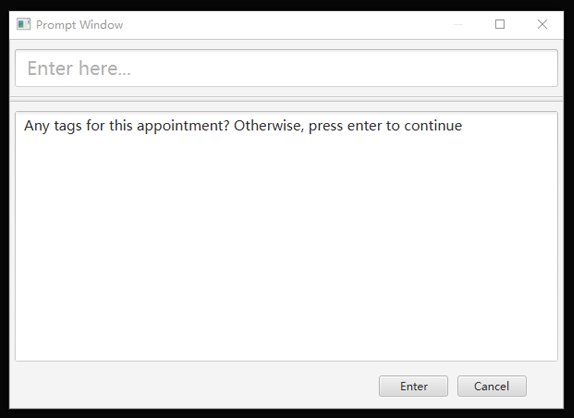
4) User may choose to provide or not provide any tags. In this case, the user does not wish to attach any tags. After that, programme proceeds to request for additional notes for the appointment, in another prompt window similar to the following:
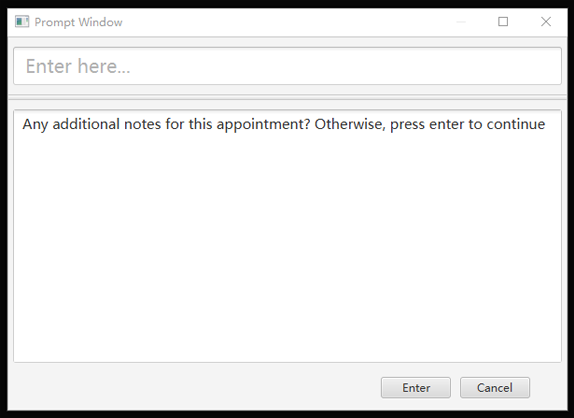
5) User may choose to provide or not provide any additional notes. In this case, the user does not wish to add any additional notes. Upon completion, programme creates the appointment and displays the following message to the user:
New appointment added: Appointment ID: e3 scheduled for patient ID: p7 during: 31/10/2018 09:30 to 31/10/2018 10:30
Details:
Tags:
3.11. Select an appointment : select appointment
Format: select appointment APPOINTMENT_ID
Selects an existing appointment and its details will display on the right. If necessary, switches the application to appointment management mode. Selecting appointment replaces physically clicking an appointment card. Hence, you can only select an appointment that is displayed on the left.
You may select a past appointment by first typing list appointment all.
|
Examples:
-
select appointment e5 -
select appointment e29
3.12. Edit appointment information : edit appointment
Format: edit appointment APPOINTMENT_ID [p/PATIENT_ID] [t/TIME] [d/NOTES] [s/TAG]
Edits an existing appointment with the given field(s). The constraints of each field are the same as those of the command add appointment. If necessary, switches the application to appointment management mode.
| At least one of the optional fields must be provided. |
To edit the time of the appointment, [t/TIME] has to be entered in DD/MM/YYYY hh:mm - hh:mm format, as natural expressions are not supported in this command.
|
Examples:
-
edit appointment e1 s/SecondVisit -
edit appointment e1031 p/p5 -
edit appointment e41032 t/30/10/2019 10:00 - 11:30
3.13. List all appointments : list appointment
Format: list appointment [all]
Shows a list of all future appointments scheduled, based on the current time at which the command is executed. Using all will display past appointments in the list as well. If necessary, switches the application to appointment management mode.
3.14. Locate appointments : find appointment
Format: find appointment APPOINTMENT_ID
Shows the appointment as indicated by the APPOINTMENT_ID. If necessary, switches the application to appointment management mode.
Example:
-
find appointment e2
3.15. Delete an appointment : delete appointment
Format: delete appointment APPOINTMENT_ID
Deletes an appointment as indicated by the APPOINTMENT_ID. If necessary, switches the application to appointment management mode.
Example:
-
delete appointment e2
3.16. Clear all appointments : clear appointment
Format: clear appointment
Clears all appointments scheduled in the record. If necessary, switches the application to appointment management mode.
3.17. Add a disease : add disease
Format: add disease d/DISEASE s/SYMPTOM
Adds a new disease to the patient book.
You must include one and only one DISEASE parameter with prefix d/ and at least one SYMPTOM for that disease
with prefix s/. Duplicate symptoms can be included but only one will be added into the patient book. The DISEASE
and SYMPTOM parameter can take any characters except comma. Both DISEASE and SYMPTOM parameters cannot exceed
20 characters in length.
When you try to add an existing disease into the patient book, the following error message will be shown to you:

Hence, you may try command find disease NAME to find related symptoms of this existing disease.
Example:
-
add disease d/acne s/pustules s/blackheads

-
add disease d/alcohol misuse s/stroke s/stroke s/mouth cancer
Symptom 'stroke' will be included once in our record. -
add disease d/obesity d/obesities s/overweight
This is an invalid command due to multiple occurrence of disease paramters. Hence, you will be prompted to enter a correct command:

-
add disease d/averylongdiseaseparameter s/dummySymptom
Returns an error message:

-
add disease d/invalid,disease s/dummySymptom
Returns an error message:

3.18. List all diseases : list disease
Format: list disease
Shows a list of all diseases in alphabetic order in the patient book.
3.19. Locate diseases : find disease
Format: find disease NAME
Finds the disease which its name is specified in the command and returns its related symptoms displayed in alphabetic order.
-
The search is case insensitive; e.g. ‘HIV’, ‘hIV’ and ‘hiv’ are all equivalent.

-
Only full words will be matched; e.g. ‘confus’ will not match ‘confusion’.
Example:
-
find disease influenza
Returns all the symptoms related to disease ‘influenza’:

3.20. Predict disease : predict
Format: predict s/SYMPTOM
Predicts a disease from a given set of symptoms.
You must include at least one SYMPTOM parameter with prefix s/ to predict a disease. All
diseases that contain the set of symptoms will be returned and displayed in alphabetic order.
-
The
SYMPTOMparameter is case insensitive; e.g. ‘fever’ will match ‘FeVER’. -
Only diseases containing all the symptoms given in the command will be returned; e.g. For command
predict s/fever s/blackout, even if disease ‘bacteremia’ contains symptom ‘fever’, it will not be returned since it does not contain symptom ‘blackout’. -
If none of diseases contain the given set of symptoms, an error message will be shown to you:
Example:
-
predict s/fever s/blackout
Returns diseases which contain the two symptoms:

-
predict s/cry
Returns an error message:

-
predict s/
Returns an error message:

3.21. Locate drug : find drug
Format: find drug NAME
Searches a database of drugs licensed for sale in Singapore, and returns basic pharmacological information about all drugs whose names contain the given search phrase. Results are displayed in the form of a numbered, scrollable list.
-
The search is case-insensitive; e.g.
find drug GLYCOMET, is equivalent tofind drug glycomet. -
Partial matches will be included as results; e.g.
find drug lyriwill return the drug "Lyrica" as one of the results.
Example:
-
find drug panadol
Returns all drugs with names containing "Panadol" as results.

3.22. Read more about drug : moreinfo
Format: moreinfo [INDEX]
Displays full pharmacological information about any drug in the list
of search results that are produced by the find drug command.
-
Only positive integers are accepted as inputs; eg.
moreinfo 2 -
moreinfocan be used repeatedly to view information about multiple results
Example:
-
moreinfo 3(immediately afterfind drug panadol)


3.23. List entered commands : history
Format: history
Lists all commands that you have entered in reverse chronological order.
| Tip: Pressing up and down arrows will display the previous and next input respectively in the command box. |
4. Command Summary
-
Add a disease :
add disease -
Add a patient :
add patient -
Add an appointment :
add appointment -
Clear all appointments :
clear appointment -
Delete a patient :
delete patient -
Delete an appointment :
delete appointment -
Edit appointment information :
edit appointment -
Edit patient information :
edit patient -
Exit the programme :
exit -
List all appointments :
list appointment -
List all diseases :
list disease -
List all patients :
list patient -
View command history :
history -
Locate appointments :
find appointment -
Locate diseases :
find disease -
Locate patients :
find patient -
Locate drug :
find drug -
Predict disease :
predict -
Read more about drug :
moreinfo -
Select a patient :
select patient -
Select an appointment :
select appointment -
Switch to appointment management mode :
mode appointment -
Switch to patient management mode: :
mode patient -
View help :
help